VS Code용 ROS2 환경설정 및 Debug 설정방법 (2022.03.25)
1. Visual Studio Code 설치
VS Code를 다운로드 및 설치 (https://code.visualstudio.com/Download)
![vscode_install]()
VS Code 실행하여 Extensions 설치
C/C++/Python Extensions (VS Code Extensions for C++ and Python)
Name Code Name Description C/C++ ms-vscode.cpptools C/C ++ IntelliSense, 디버깅 및 코드 검색 CMake twxs.cmake CMake 언어 지원 CMake Tools ms-vscode.cmake-tools CMake 언어 지원 및 다양한 툴 Python ms-python.python 린팅, 디버깅, Intellisense, 코드 서식 지정, 리팩토링, 단위 테스트 등 ROS Extensions (VS Code Extensions for ROS, URDF, Colcon)
Name Code Name Description ROS ms-iot.vscode-ros ROS 개발 지원 URDF smilerobotics.urdf URDF / xacro 지원 Colcon Tasks deitry.colcon-helper Colcon 명령어를 위한 VSCode Task File Format Extensions (VS Code Extensions for XML, YAML, Markdown)
Name Code Name Description XML Tools dotjoshjohnson.xml XML, XQuery, XPath 지원 YAML redhat.vscode-yaml YAML 지원 Markdown All in One yzhang.markdown-all-in-one Markdown 지원 유용한 Extensions (VS Code Extensions for Etc.)
Name Code Name Description Highlight Trailing White Spaces ybaumes.highlight-trailing-white-spaces 의미 없이 사용된 공백의 스페이스 문자 강조 EOF Mark msfukui.eof-mark [EOF]이 없이 끝난 파일에 [EOF] 문자 추가 Better Comments aaron-bond.better-comments alert, informational, TODO 등의 코멘트 강화 기능

2. Visual Studio Code 개발환경 설정
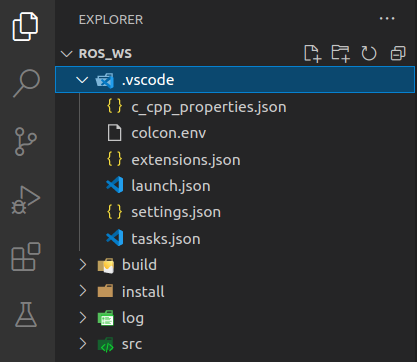
1) ROS WorkSpace 설정
- Visual Studio Code에서 File에서 “ Add Folder to Workspace”를 선택하여 ROS2 설치시 설정한 workspace 폴더를 연다.
Workspace 폴더명 예시: /home/username/ros2_ws
![ros2_workspace]()
2) User Setting(Settings.json) 설정
‘settings.json’은 VSCode의 사용자별 글로벌 환경 설정을 지정하는 파일이다. 이 파일에 기술된 설정들은 모든 작업 공간(workspace)에서 적용된다. 예를 들어, 미니맵 사용, 세로 제한 줄 표시, 탭 사이즈 등 이다.
- ROS 관련 설정
- ROS Distibute 설정: ROS 버전을 지정
- Colcon Tasks 설정: Colcon이 지원되는 Task를 사용을 위한 설정
- File Associations 설정: ROS에서 사용되는 파일 확장자를 명시
- 설정 단축키: Ctrl + ‘,’
- ROS Distribute 설정
- Settings에서 ROS: Distro 검색 후에 현재 ROS 버전을 입력(예: foxy)
![ros_distro]()
- Settings에서 ROS: Distro 검색 후에 현재 ROS 버전을 입력(예: foxy)
- Colcon 설정
- Settings에서 Colcon: Provide Tasks를 검색 후 True로 체크
![colcon_provide]()
- Settings에서 Colcon: Provide Tasks를 검색 후 True로 체크
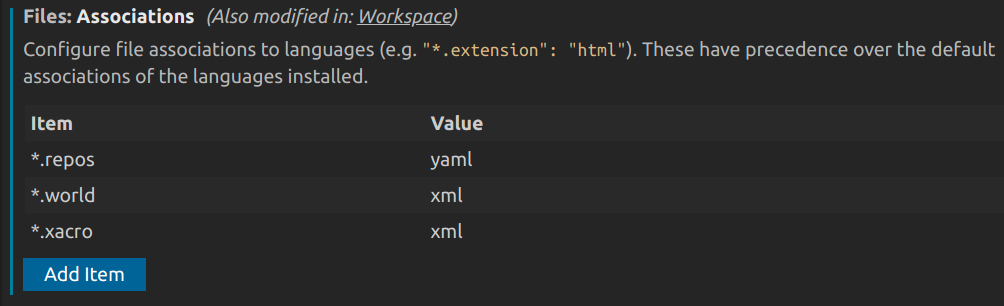
- Files Associations 설정
- Settings에서 Files: Associations 검색 후 다음과 같이 repos, world, xacro 를 추가
![file_associations]()
- Settings에서 Files: Associations 검색 후 다음과 같이 repos, world, xacro 를 추가
- ROS Distribute 설정


3) Task Setting(tasks.json) 설정
VSCode에서는 외부 프로그램을 Command Line Interface (CLI) 을 통해 연동하게 하는 기능이 있는데 이를 Task 라고 한다. 단순한 텍스트 에디터 기능이 기본인 VSCode가 다양한 기능을 수행하고 쉽게 기능 확장을 사용할 수 있게 된 것도 이 Task 기능이 있었기 때문이다.
- ROS Task 설정
- Colcon: build Debug : 디버깅을 위한 빌드 설정
- Colcon: build Release : 릴리즈를 위한 빌드 설정
- Colcon: build RelWithDebInfo : 배포용으로 빌드하지만 디버깅도 가능하도록 용량을 최대로 줄여 빌드
- Colcon: Test : Test 를 위한 빌드 설정
- Colcon: Clean : Colcon Build 된 파일 및 폴더를 정리하도록 빌드 설정
빌드 Task 설정 단축키: Ctrl + Shift +B
- Build Task를 설정하기 위해 우선 Run Build Task (Ctrl + Shift +B) 을 실행하고 Configure Task를 선택하여 tasks.json을 다음과 같이 수정하여 ROS Colcon Build를 위한 Tasks를 설정한다.
tasks.json (~/ros2_ws/.vscode/tasks.json)
1
2
3
4
5
6
7
8
9
10
11
12
13
14
15
16
17
18
19
20
21
22
23
24
25
26
27
28
29
30
31
32
33
34
35
36
37
38
39
40
41
42
43
44
45
  {
    "version": "2.0.0",
    "tasks": [
      {
        "label": "Colcon: build Debug",
        "type": "shell",
        "command": "colcon build --cmake-args '-DCMAKE_BUILD_TYPE=Debug'",
        "problemMatcher": [],
        "group": {
          "kind": "build",
          "isDefault": false
        }
      },
  		{
        "label": "Colcon: build Release",
        "type": "shell",
        "command": "colcon build --cmake-args '-DCMAKE_BUILD_TYPE=Release'",
        "problemMatcher": [],
        "group": {
          "kind": "build",
          "isDefault": false
        }
      },
  		{
        "label": "Colcon: build RelWithDebInfo",
        "type": "shell",
        "command": "colcon build --cmake-args '-DCMAKE_BUILD_TYPE=RelWithDebInfo'",
        "problemMatcher": [],
        "group": {
          "kind": "build",
          "isDefault": false
        }
      },
      {
        "label": "Colcon: Test",
        "type": "shell",
        "command": "colcon test && colcon test-result"
      },
      {
        "label": "Colcon: Clean",
        "type": "shell",
        "command": "rm -rf build install log"
      }
    ]
  }
4) Launch Setting(launch.json) 설정
VSCode에서의 Launch는 ‘Run and Debug’ (
Ctrl + Shift + d)에서 사용되는 실행 명령어로 언어별, 디버거별로 설정이 가능하고 세부 옵션으로 Launch가 실행되기 전 즉 디버깅하기 전에 사용할 Task를 지정하거나 콘솔 기능을 설정할 수도 있다.Launch 설정
- Debug-rclpy(debugpy) : debugpy를 이용해 rclpy를 디버깅
- Debug-rclcpp(gbd) : gdb를 이용핸 rclcpp를 디버깅하고 디버깅 전 미리 colcon build debug를 수행
launch.json (~/ros2_ws/.vscode/launch.json)
1
2
3
4
5
6
7
8
9
10
11
12
13
14
15
16
17
18
19
20
21
22
23
24
25
26
27
28
29
30
31
32
33
34
35
36
37
38
39
40
41
42
43
44
45
46
47
48
49
50
51
52
53
54
55
56
{
    "version": "0.2.0",
    "configurations": [
      {
        "name": "ROS: Attach",
        "type": "ros",
        "request": "attach"
      },
      {
        "name": "ROS: Launch",
        "type": "ros",
        "request": "launch",
        "target": "/home/username/ros2_ws/src/test_pkg/test_pkg.launch"
      },
      {
        "name": "Debug-rclpy(debugpy)",
        "type": "python",
        "request": "launch",
        "program": "${file}",
        "console": "integratedTerminal"
      },
      {
        "name": "Debug-rclcpp(gbd)",
        "type": "cppdbg",
        "request": "launch",
        "program": "${workspaceFolder}/install/${input:package}/lib/${input:package}/${input:node}",
        "args": [],
        "preLaunchTask": "Colcon: build Debug",
        "stopAtEntry": true,
        "cwd": "${workspaceFolder}",
        "externalConsole": false,
        "MIMode": "gdb",
        "setupCommands": [
          {
            "description": "Enable pretty-printing for gdb",
            "text": "-enable-pretty-printing",
            "ignoreFailures": true
          }
        ]
      }
    ],
    "inputs": [
      {
        "id": "package",
        "type": "promptString",
        "description": "Input ROS2 Package Name you want to debugging",
        "default": "ROS Package Name"
      },
      {
        "id": "node",
        "type": "promptString",
        "description": "Input ROS Node Name you want to debugging",
        "default": "ROS Node Name"
      }
    ]
  }
3. VS Code에서 ROS 명령 실행
1) ROS Core 실행
- ROS 2에서는 Core 실행이 필요 없지만 ROS 2 Daemon을 시작하여 ROS 2 Foxy Status 출력을 위해 사용함 (생략 가능)
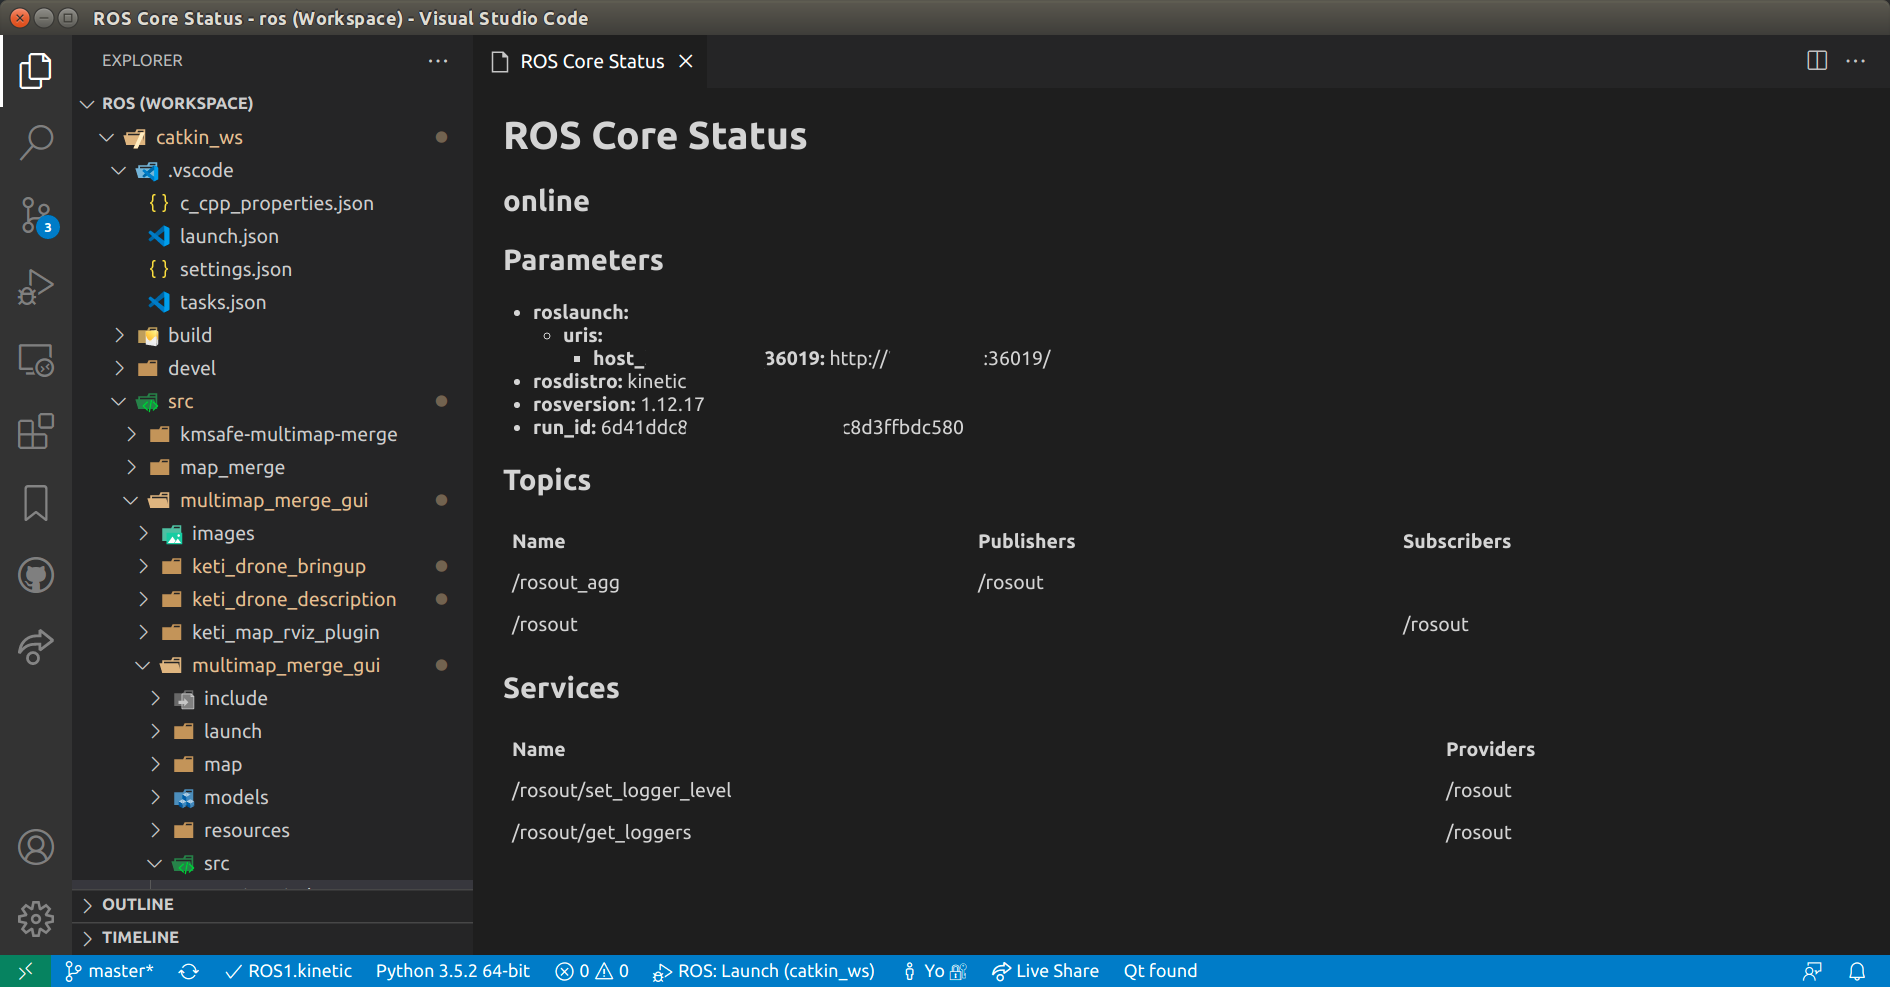
Ctrl + Shift + P 실행 후 ‘ROS: Start’ 입력
![ros_core_status]()
VS Code 하단 파란 바에 ROS2.foxy 왼쪽에 체크표시가 있으면 ROS Core가 가동중이고, 그곳을 누르면 ROS Core의 정보가 출력됨(ROS Parameters, Topics, Services)*
*현재 ROS2.foxy 에서는 문제가 있어 status 출력이 되지 않는것 같음
2) ROS Core 중단
- ROS 2에서는 Core 중단이 필요 없지만 ROS 2 Daemon을 중단하여 ROS 2 Foxy Status 출력을 중지시키기 위해 사용함 (생략 가능)
- Ctrl + Shift + P 실행 후 ‘ROS: Stop’ 입력
- ROS Core 를 중단함
3) 새로운 ROS Package 생성
- Ctrl + Shift + P 실행 후 ‘ROS: Create Catkin Package’ 입력
- 새로운 ROS Package를 생성함
- Package name : 생성할 package의 이름을 입력
- Dependencies : 생성할 package의 의존성 package를 입력(예: roscpp, rviz, nav_msgs 등)
4) ROS Node 실행(rosrun)
- Ctrl + Shift + P 실행 후 ‘ROS: Run a ROS executable (rosrun)’ 입력
- 실행가능한 ROS Node를 구동
- Choose a package : 실행할 ROS Node의 package를 입력
- Choose an executable : 실행할 ROS Node 파일 입력
- Enter any extra arguments : 추가적으로 넣을 arguments들을 입력
5) ROS Launch 실행(roslaunch)
- Ctrl + Shift + P 실행 후 ‘ROS: Run a ROS launch file (roslaunch)’ 입력
- ROS Launch 파일 구동
- Choose a package : 실행할 ROS Launch파일의 package를 입력
- Choose a launch file : 실행할 ROS Launch파일 입력
- Enter any extra arguments : 추가적으로 넣을 arguments들을 입력
6) ROS Build (Colcon Build)
- Ctrl + Shift + B 실행 후, 상황에 맞게 ‘Colcon: build Option’ 입력
- Colcon Build Options
- Colcon: build Debug : 디버깅 가능하도록 빌드
- Colcon: build Release : 디버깅이 되지 않는 배포용 빌드
- Colcon: build RelWithDebInfo : 배포용으로 빌드하지만 디버깅도 가능하도록 용량을 최대로 줄여 빌드
- Colcon Build Options
4. ROS Debugging in VS Code
- 우선적으로 Colcon: build Debug 나 build RelWithDebInfo 로 코드를 Build 한다
- Ctrl + Shift + B 실행 후, 상황에 맞게 ‘Colcon: build Debug’ 입력
1) ROS Attach 방법
- 디버깅할 소스코드에 Break 포인트를 걸어두고, 해당 코드의 ROS Node를 실행
- Ctrl + Shift + P 실행 후 ‘ROS: Run a ROS executable (rosrun)’ 입력
- Choose a package : 디버깅할 ROS Node의 package를 입력 (예시: beginner_tutorials)
- Choose an executable : 디버깅할 ROS Node 파일 입력 (예시: talker)
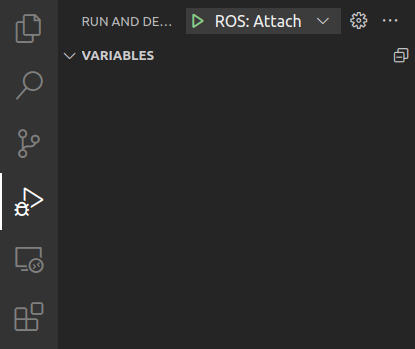
VS Code의 Run and Debug (’Ctrl + Shift + D’)로 이동
![vscode_debug_attach]()
- ‘ROS: Attach’를 선택하고 디버깅 플레이버튼 누름
- Choose Runtime type of node to attach to 에는 현재 디버깅할 ROS Node의 Type을 선택(C++, Python)
- Select the process to attach to 에는 위에서 실행했던 ROS Node의 이름(예시: talker)을 입력 및 선택하여 구동중인 ROS Node Process에 Debugger를 붙여 Debugging을 시작
2) ROS Task 방법
- ROS Cpp 파일
- 디버깅할 소스코드에 Break 포인트 설정
VS Code의 Run and Debug (’Ctrl + Shift + D’)로 이동
![vscode_debug_rclcpp]()
- ‘Debug-rclcpp(gbd)’를 선택하고 디버깅 플레이버튼 누름
- ROS Package Name 에 디버깅할 ROS Node의 Package 이름을 입력
- ROS Node Name 에 디버깅할 ROS Node의 이름을 입력하면 ROS Node가 실행되며 Break 포인트가 걸려 디버깅이 시작
ROS Py 파일
![debug_rclpy]()
- 디버깅할 소스코드에 Break 포인트 설정
VS Code의 Run and Debug (’Ctrl + Shift + D’)로 이동
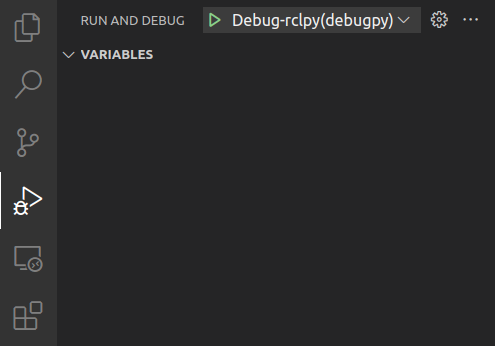
![vscode_debug_rclpy]()
- ‘Debug-rclpy(debugpy)’를 선택하고 디버깅 플레이버튼 누름
- ROS Package Name 에 디버깅할 ROS Node의 Package 이름을 입력
- ROS Node Name 에 디버깅할 ROS Node의 이름을 입력하면 ROS Node가 실행되며 Break 포인트가 걸려 디버깅이 시작

3) ROS Launch 파일 Debugging
- 디버깅할 소스코드에 Break 포인트 설정
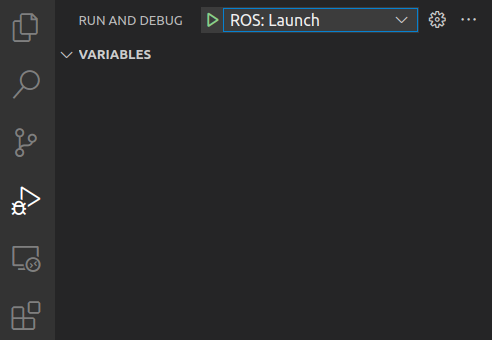
- VS Code의 Run and Debug (’Ctrl + Shift + D’)로 이동
Debug Type을 ‘ROS: Launch’로 설정하고 그 오른쪽에 있는 톱니바퀴를 눌러 launch.json 파일을 오픈
![vscode_debug_roslaunch]()
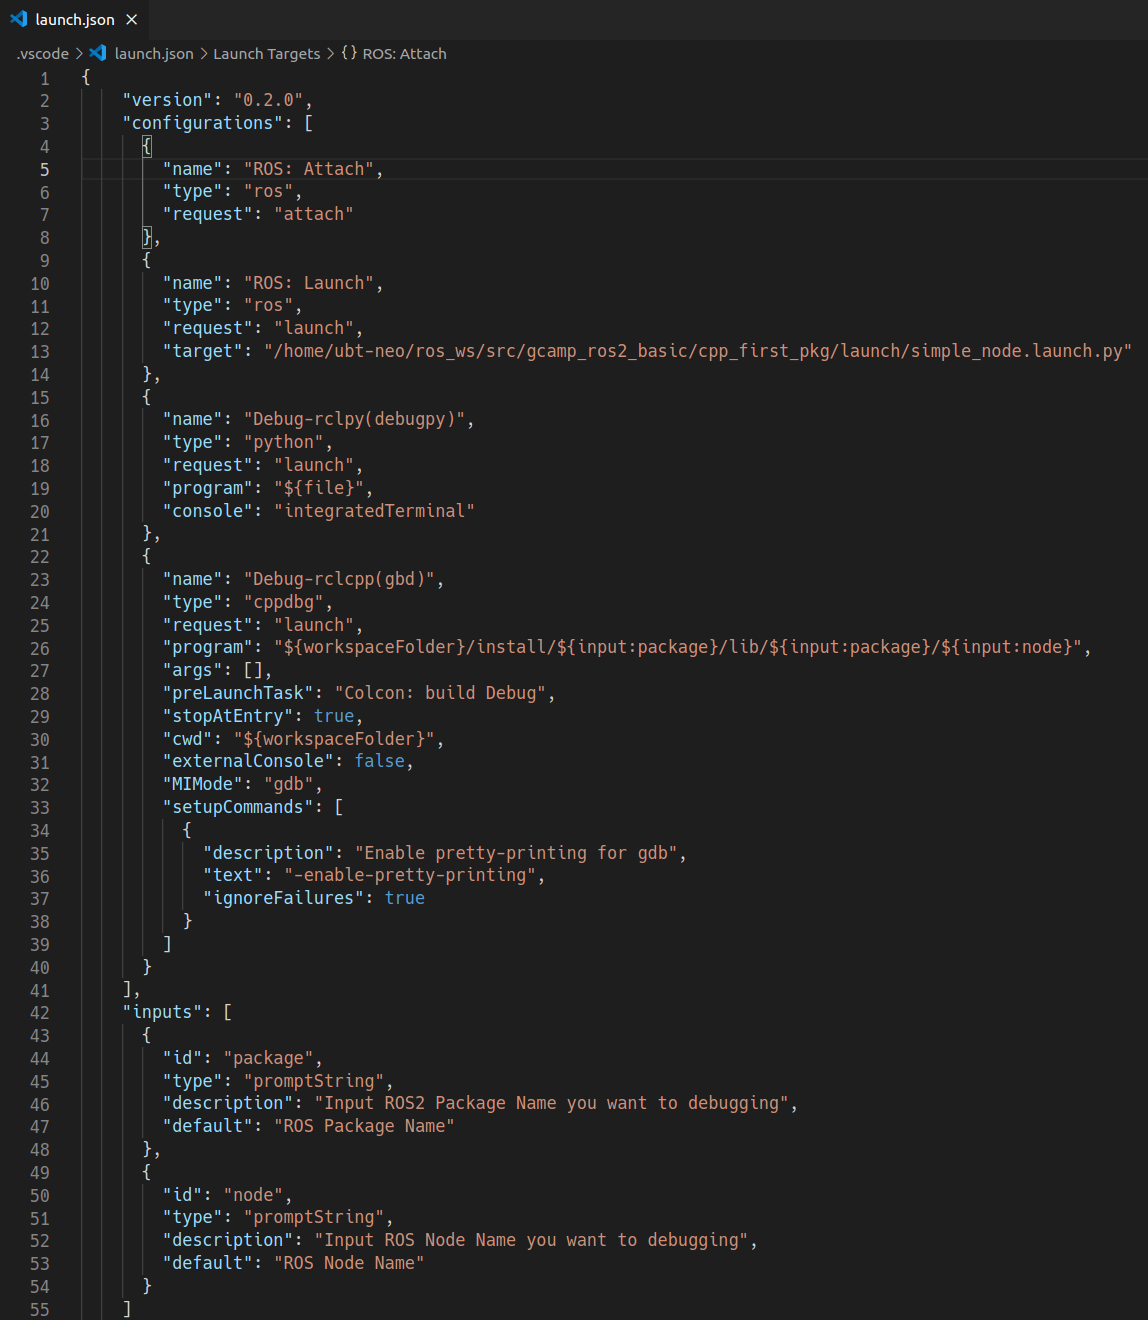
launch.json 파일 안에 ROS: Launch Configuration 항목 중, “target” 에 디버깅에 사용할 Launch 파일의 절대 경로를 입력하고 저장
![launch_json]()
- F5 버튼이나 ‘ROS: Launch’를 선택하고 디버깅 플레이버튼 눌러 디버깅 시작
- Launch 파일이 실행되며 위에서 설정한 Break 포인트에 디버깅 걸림
- 현재 VS Code의 ROS Extension의 버전 (0.8.2)에 문제가 있어 ROS2 Launch파일 디버깅이 안됨
Ros 2 Launch파일 디버깅을 위해 임시로 ROS Extension의 버전을 0.6.8 로 다운그레이드 하여 사용해야함
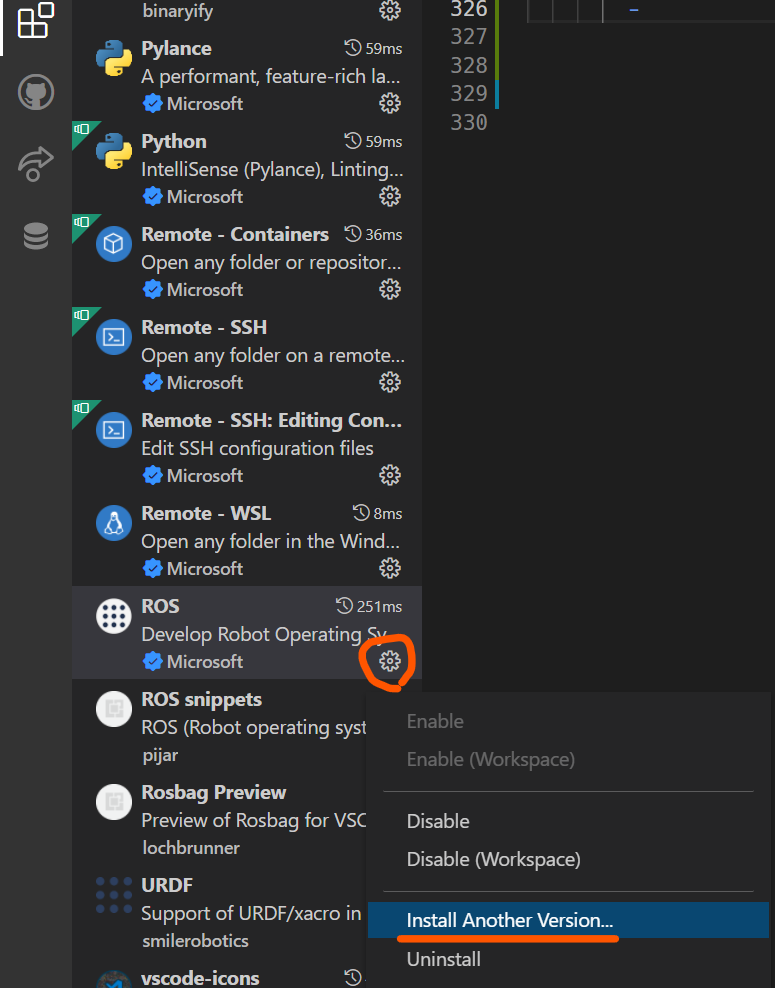
- ROS Extension 0.6.8로 다운그레이드 하는 방법
- VS Code의 왼쪽 메뉴바 중 Extension 아이콘을 선택해 현재 설치해놓은 Extension 중 ROS Extension을 선택
- ROS Extension에 있는 톱니바퀴를 눌러 “Install Another Version”를 누른 후, 0.6.8 버전으로 설치 후 Reload Required 선택
![vscode_install_another_ver]()
- ROS Extension 0.6.8로 다운그레이드 하는 방법